Sunday, May 8, 2016

The Challenge of Being an Artist and a Full Time Mom

As I felt a gentle breeze caress my skin this morning on Mother's Day weekend. I relished in the moment of all the beauty the day had to offer me. It's as if the breeze was begging me to come out and breathe in all the beauty this gorgeous Spring day has to offer.


But wait, I felt my mind wander. Like so many other Moms, I had a list at least a mile long running through my head. It ranged from laundry, dog baths, cleaning carpets, to dreaded family and studio paperwork and so much more. 

Often I find myself trying to juggle and balance family and art studio time. I love them both. Being in my art studio is my happy place. It soothes my soul from all of life's demands. I'm so thankful to have a supporting husband and family so that I can pursue this passion I've had my entire life. 

An art coach, named Alyson Stanfield, who I've been following is helping me realize that creating and keeping a schedule is a top priority. Alyson's tips and recommendations have helped me tremendously. If you are a fellow artist reading this, I highly recommend checking her out: http://artbizcoach.com/

As a mother of a young teen and preteen, I have many more years of facing the demands of caring for my children and shuttling children to sports and extracurricular activities. So, if you see me absent for a while, I'm just tending to my family, but rest assured, I am not leaving my art.


As this sketch of my youngest son and I from about 7 years ago reminds me of how fast time really does go by, I realize my children will be grown all too soon and our home will be very empty and quiet then. There will be plenty of studio time then and for now, I'm happy to be creating as much as I'm able to create and enjoying my children to the fullest. 

Happy Mother's Day

written by Tina A Stoffel

Saturday, April 16, 2016

Five Outstanding Artists You Will Love


During the past few years, I've been blessed with the opportunity to network with some wonderful artists. Although I have seen much talent,there are a few that stand out so much that I wanted to share some of them and their work with you.


1. Ritch Gaiti www.Gaiti.com


What is Ritch Gaiti's Art About?

Since the first time I saw Ritch's work, I was awestruck at his use of color and texture. Preferring the rich colors of oils, Ritch focuses on delivering  feeling, emotion, and conveying mood. He tends to portray an ethereal feeling in his paintings which have a subject matter of the American West, mostly horses and Native Americans. Each painting takes about 4-6 weeks to complete.


About Ritch Gaiti

At the age of 6 or 7, Ritch developed an interest in art. After taking a few art classes, Rich decided that wasn't for him and he has been self taught since. Ritch says "Creating something from nothing turns me on. I love to envision and make things come to life-and see things grow".
Bragging Rights: "My mother likes my work.. and I have exhibited in many galleries and museums throughout the country".

To view Ritch Gaiti's work, please go visit the following:
www.Gaiti.com
Ritch Gaiti on Facebook

2. Joulia Apostolova 

 Web Address: https://www.etsy.com/shop/JuliaApostolova


Julia's bright shining personality is as beautiful as her art. 

About Julia Apostolova's Art

Julia specializes in abstract paintings. She enjoys abstract art because it gives her much freedom and relaxes her.  She paints with almost everything - Acrylic, Oil, Mixed Media, Watercolor, Ink, but prefers mostly Acrylic and the relief textures with sculpture materials. Depending on the chosen technique, Joulia's art may take anywhere from 3-4 days to 3-4 weeks to complete.


More About Julia Apostolova       

Early in life, before she was able to read, she was drawing all the time. She later graduated with a Bachelors Degree  from the ''Academy of Music, Dance and Fine Arts'' in Plovdiv (Bulgaria, Europe). When asked why she creates art, Julia replied, "I can't imagine my life without art and mostly, because it makes me happy when I make other people happy! Everything inspires me - the turquoise color of the sea, the majestic nature, the colors and the music in our lives and my exciting travels around the world! "  
Her favorite quote is: ''Art washes away from the soul the dust of everyday life''.
Pablo Picasso 

Bragging Rights

Gallery Representation:

Amsterdam Whitney Gallery - Chelsea, New York, USA
 The Brick Lane Gallery- London, UK, thebricklanegallery.com

and has also had works featured in numerous catalogs, websites and blogs

3. Deborah Rankin Matz 

Website: http://www.artworkbydebbiematz.com/


About Deborah's Art


Deborah paints beautiful sea life and creatures of the oceans. Although she paints in a variety of sizes, many of her paintings are large and breathtaking. She networks with professional underwater photographers from all over the world which have been gracious enough to allow her to paint from their beautiful photographs. Through this experience she has a profound respect and concern for our environment, the oceans and the beautiful sea creatures that live within.


More About Deborah

Deborah Rankin Matz is originally from Ft. Walton Beach, Navarre and the Destin Florida area. Always having a love for art and drawing, Deborah decided to attend the Art Institute of Fort Lauderdale. After she and her husband relocated to Destin Florida to retire, she was so inspired by the beautiful beaches and the Destin culture that she decided she was at the point in her life to enjoy her art again. 

Also find Deborah on Facebook: Facebook Deborah Rankin Matz


4. Rob Langenberg    Shop Robs Art


About Rob's Art

Rob is inspired by nature, the movement and loyalty of animals, especially horses ( he stresses horses). Living close to the coast, he is also inspired by the sea. Rob paints in oil paints and has found his niche in a unique wet on wet process resulting in astonishing paintings. 


More About Rob

Rob's grandfather taught him to draw at the age of 5 on the back of a cigar box. Although Rob did later attend some art classes, he is primarily self taught. Painting in oils, Rob enjoys creating art because it gives him great pleasure and peace. 

Also Find Rob on Facebook: https://www.facebook.com/rob.langenberg


5.  Zena Rowland Website: www.ZenaRowland.com


Turners Wood Oil on Canvas by Zena Rowland

About Zena's Art

Zena paints in oils and I find the beautiful use of color stands out most in her work. Zena states that she so inspired by color that her ideas come after she heads to the canvas where she starts with one or two colors. She puts them on the canvas and the inspiration comes from there. She loves to create relaxing scenes and many have said that they find her paintings spiritual and have used them for meditation. 

More about Zena

Zena has always loved art which was her favorite subject at school. She found herself looking forward to that particular lesson. Since she felt students weren't really encouraged much at school, she is primarily self taught.

Besides her website, you can find Zena on the following networks:
Google+: Zena Rowland


Interviewing each of these talented artist was a pleasure. I found we all have a few things in common. It is interesting that we all discovered our love of art at a very early age and most of us were self taught.  


Article written by Tina A Stoffel
www.TinasFineArts.com

Saturday, April 2, 2016

Elephant Painting Process by Tina A Stoffel


My first video using my GoPro. You can see quite a bit of my technique in this video from starting my under painting with a brush to where I progress to the painting knife to reveal texture. Unfortunately the battery ran out before I finished the painting.


Keep in mind this has been cut and edited so you don't have to see me returning to my palette and reference photo. After the editing, it has been sped up to 8 times the actual speed. Oh how I wish I actually painted this fast. Hahahahahah


I plan do some more of these in the future. Hope you enjoy it.


Tina A Stoffel

Sunday, March 20, 2016

Tips for Protecting Your Artwork from Theft

Artist Sharing Concerns

Recently, while networking with a new artist who's work got a phenomenal response, I was asked if they should watermark their work. This artist proceeded to tell me that they don't share much work because they have concern about their works getting copied and stolen. That's too bad because if an artist chooses not to share their work, they are missing out on getting their work seen.

The Watermarking Debate and Image Resolution

Watermarks are a tough question. Sometimes I use them and sometimes I don't. It depends on what I"m sharing electronically. Once I've completed a work and have signed it, I usually don't watermark it because my signature is on the piece. However, I don't upload high resolution photos either. As seen on my a portion of my Water Lily Pond painting below, I try to keep them at 1 MB because it's hard to make a good copy from just 1MB, but it still shows nicely on social media. I think this is the best option because the watermark does distract from your image.
Low Resolution Image is fuzzy when enlarged
When you do watermark, you need to make it difficult to remove. There are programs and people that can take the time to remove them.
Programs like Gimp or Adobe Photoshop can be used to create a watermark. I create mine with a brush to where I can set the size, color and transparency. It should be large enough to cover part of the image, but transparency as well. The transparency doesn't interfere with too much of the image and I believe is harder to remove. Just photograph your signature and follow the appropriate steps below. Make sure your background is set to Transparent.

LINKS

Find the Gimp Tutorial here: https://www.gimp.org/tutorials/Custom_Brushes/
Find the Photoshop Tutorial here: Create a Photoshop Brush

To Get Your Work Noticed You Have to Take Risks

There are never any guarantees, but if you want to get noticed and get your work seen, you have to get it out there. Be cautious of art sites too. I follow some professional sites and one of them recommended an art social media sharing site to get your work seen. I joined and uploaded some works, but soon backed off of because in order for your work to show nicely, the file needs to be larger than I'm comfortable with uploading. To check the image resolution of your work on a site, just drag your art to your desktop, right click, then click properties on the drop down. You should find the image resolution details on the drop down list.

Written by Tina A Stoffel

Monday, March 14, 2016

Five Tips for Maximizing Your Art Studio Time

For many artist, myself included, balancing studio time can be a challenge. Some of us have to work a full time job for steady income. Some may have interfering health conditions. Others may be taking care of children, parents, etc.
Me, LOL


For me, I'm running the household and raising a teen and preteen while my husband works incredibly long hours to support us. It would be very difficult for me to do what I do without him and I would be lucky to get a painting or two done a year.

Everyone's situation is unique, so what can you do to maximize your studio time? For me, studio time comes first (after my family of course). Sometimes that can minimize time due to running my children to sports, band, social activities or if they are sick.

Five tips for maximizing your studio time

1. Set a schedule and post it on your art studio door or near your work space. Put it in your phone. (Come on now, you knew this was coming).
2. Be flexible
3. Limit your time on Social Media (I'm going for 1-1/2 hours a day)
4. Get organized
5. Work efficiently


Let me address these one by one

1. Why set a schedule?
Everyone else has one, right? As creative people, most of us do not like schedules, or at least I don't. As a matter of fact, I can not stand them. I admit, I'm still working on ironing mine out probably because it's constantly changing with children. However, think of it like this, when you are working for an employer, you have set hours and must be there during that time. The same should apply to your studio time. Others should not bother you unless it's an emergency. This is a sure way to be productive on a regular basis. For your convenience, I'm going to attach a copy of a sample schedule. You should be able to download and print. If you can not edit this one to your liking, you can create your own in Microsoft Excel or Google docs which automatically saves to your Google drive. Click the following link for a copy of this schedule.

Are you working full time? Set aside a little time each night through the week, or every other night, even if it's just 30 minutes. Just for working on the sketch for your next painting, priming or building a canvas, or varnishing a painting. All this in small sessions can add up to a lot of extra time. Set aside quality time on weekends and holidays to dedicate to longer sessions and completing work. 

2. Be Flexible. In my case, I have to be. My kids are down with a stomach bug, wisdom teeth removal, going to sporting events, banquets, (yes this all happened in the past week) needing help with homework, school events, Dr. Appointments, etc. Of course this goes against Rule number 1, but it happens and you should still have a schedule and stick to it as much as possible. That will keep you on track, and don't beat yourself up too much if you are off schedule a bit. Get back on track as soon as possible.


3. Limit your time on Social Media: I'm guilty again. This is tricky because most of us are marketing on social media. If you aren't you should be. In addition to having a Facebook, Twitter, and Instagram page, I moderate 4 Google Plus Art Communities, one which is over 4,000 members. Feel free to join me there if  you like. Here is the link: Online Fine Art Exhibition. (You must request to join so we know you aren't a spammer). I'm giving myself an hour in the morning and again in the evening. I need to cut this down to 30-45 minutes though. In addition to catching up with friends and family, I market and network with artists, but this can eat up your time quickly. So set a timer, it's not hard. 

4. Get organized and stay organized. Another challenge for us creatives is to stay organized, but you will feel much more relaxed, find things easier, and in turn be more productive if you get yourself organized. You will find your supplies, forms, invoices and more with ease when you are organized. I just took a weekend off to organize my studio and it now feels so much better to go into my studio. I think I need to do that every month or two.
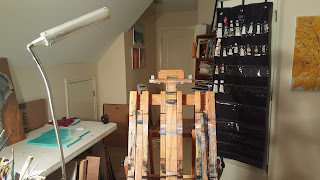
After organizing and cleaning-Ahhhhh

5. Work efficiently. Feel stuck while a painting is drying? Start your sketch and/or prep your canvas for your next project. I did this over the weekend while waiting on my Zebra painting to dry for the next layer so I don't mix the colors and get gray. Yeah, learning that one the hard way. So what did I do? Let it dry and worked on my Giraffe for the next painting. It felt great to get a  head start.


See, I sketched the Giraffe which will be the 5th painting in my wildlife series. I hope this information  has helped you. Some of the tips I've gathered are from following other artists and coaches such as Alyson Stanfield. She has amazing tips. I welcome your comments and would love to hear how you maximize  your art studio time, so please feel free to comment. 

*Clip art from openclipart.org

Tina A Stoffel


Saturday, February 6, 2016

Making Time For Creating Art

Sometimes the world comes caving in and it can pull us away from what we love most. Whether it be exercise, reading, playing music, creating art or anything else. For me, it is my art. I absolutely love being in my studio and creating art. It's what I call my "Happy Place" where I completely lose myself in all space and time. It literally soothes my soul. When I get pulled away from that, I can get a little, or a lot, grumpy.

If you follow my Social Media pages (links on this blog) you have likely noticed that I just haven't been up to my usual lately. Why? For one I have had a huge remodel along with some much needed repairs happening at my home. Dust is everywhere, a lot of decisions needed to be made and it just drained me. I did get to use my creativity in picking some new colors and decorations. Good thing I have color knowledge.

Secondly, I have not publicly shared much about my personal life because I like to keep it about my art. However, my wonderful husband is the reason I'm able to do what I do, but that comes with a price. 

He works and works while I hold down the fort and raise my kids. I have one preteen  and another teen who is not old enough to drive. While they are superstar athletes, they are very involved in a couple of demanding sports as well as wonderful musicians. I'd like to think they got some of their creativity from Mom.  With that being said, we are nearing year end tournaments in addition to the remodel. Did I mention between the two of them they were sick for about 3 weeks? That left me feeling like this woman in the cartoon and needing some extra limbs like an octopus:


In the midst of it all, I did manage to start a painting and order a book I've been wanting to get for a while. It is fittingly titled: I'd Rather Be In The Studio, by  Alyson B. Stanfield. 
While I have not attended any of Alyson's sessions, I have followed her blog and she has some wonderful advice for artists. I'm just curious if she has any tips for the busy Mom/Artist, or if it will just be a few years until my teen drives until I can devote more time to my art. I'm not rushing because I love my children dearly and realize they will be grown before I know it. Rest assured, I will not quit. It may be slower at times when my role as a Mother calls, but I never want to quit my art again, ever. 
In the meantime, I have about a 4-5 hour swim meet to attend today. I plan to take a much needed chance to open this book between swim events and check it out. 

In case you've missed it, here is an Elephant work in progress on my 3rd piece to my wildlife series. I've had to work on it in small increments as opposed to the larger painting sessions I normally have. Why? Because that has been my only option, and that is the answer to this blog title. I chose to do most of it with a painting knife because of the texture I wanted to portray.  It follows the two lions I've done. I'm planning a couple of more animals in this series for now. At which point I may break back into some beach/seascape paintings. 


Image Credits: 
Busy Mom: 
Sunshine: 

Wednesday, October 7, 2015

About My Art and What's Next

After recently painting The Majestic Lion, I've decided a group of similar paintings for a wildlife series. Followed by seascapes then likely florals.


Second Lion in my Wildlife series-work in progress

So just what is my artwork about? While I have painted a variety of subjects, if you look closely at my paintings, they revolve around the following: 

1. Nature
 (trees, animals, water, flowers)
2. Animals
3. Music: I love music and it will show up on occasion in my paintings, and may be connected with nature.
4. Spirituality-Occasionally I feel compelled to paint something spiritual such as Angels. I have mostly been moved to do so when a close friend has become ill or affected with cancer. 
5. Style: As you will see in most of my paintings, I lean towards realism with a contemporary effect. You will see a little impressionist work mixed in as well. 
6. Color-I love color, so look for vibrant colors, earth tones which reflect my love of nature, and even some paintings that are soft in color.

(Scroll to the bottom to see wildlife photos from a recent trip. This is an idea of some of the animals I intend to include in my Wildlife series.)


So what do I have planned and when? As an artistic person, I am a complete free spirit. Variety and spontaneity keep me fresh and creative. 

However, I will be working on a wildlife series for the next few months. If you connect with or admire animals, wildlife and nature like I do. Keep an eye out for my work. 

Somewhere in that mix, I do have a violin portrait, some commission work and possibly another
palette knife boat painting you will see. 

After these paintings take place, I will be focusing on some seascapes and Equine paintings. Flowers will come later. 

As always, thank you for reading and following my art. 

Written by
Tina A Stoffel


And a large 36 x 48 lion oil painting Work in Progress

Tuesday, September 15, 2015

Announcing My New Website

I'm happy to announce the launch of my new website: www.TinasFineArts.com.

After several painstaking hours, I have moved to a new and hopefully hosting service.
It sure gave me quite an appreciation for web developers and I now understand why companies have web administrators. However, as you know, us artists are a different breed.

What's new?

New Paintings
Secure Shopping
More Artwork
Links to Prints and gifts
Newsletter Sign-Up


That's right. TinasFineArts.com now has a SSL certificate for secure shopping. The checkout process is via Paypal, but you may use your credit card and do not need a Paypal account. As always, when making an internet purchase, you should make sure  your browser displays the https before the web address. That ensures your information is secure.


How about signing up for my newsletter? Although I always announce the release of my art on Social Media. Most of us know, that unless you are online at just the right time, posts often get buried in the news feed. Newsletters will go  out monthly. Depending on productivity, there may be an extra announcing new paintings. I promise I will not share or sell your information. It stays private with me.


You are invited to visit and share my new website. Clicks help me move up in the rankings. Feel free to share my art. I love shares because it helps spread the word. You can like my Facebook Page here: https://www.facebook.com/TinaAStoffelArts
To follow me on Google Plus, click here: Tinas Fine Arts on Google Plus.

Thanks to all of you who share and support my art. This means so much to me.

Tina Stoffel


Thursday, May 7, 2015

HOW MY MOM INFLUENCED MY ART CAREER

For this Mother's Day, I would like to take a moment to thank all the special Moms for all your sacrifices, love, support, caring and everything you do. I especially want to thank my Mom for being the one who helped me and encouraged me to develop my art skills.


Watercolor Courtesy of  Christina Arsenis Google Plus

My Mother's Day Story 
From the time my Mom found me into her paint by numbers while I was still in the crib, to buying me my first art kit by, Jon Gnagy (a wonderful book for starters), it was my Mom who first saw my potential and quickly moved to foster my talents.


Charcoal at age 11


It was my Mom who drove my friend and I to the IUPUI Herron School of Art for weekend art classes that we won through a scholarship at our Jr. High in 9th grade. It's my Mom who still supports me, manages to be the one to like or comment on nearly every single Facebook post I make.

This Mother's Day couldn't be a better time to take the opportunity to honor my Mom and than her for helping me reach my full potential. So if you are reading this Mom, Thank you for everything.

How has your mom helped you achieve your goals and reach your dreams?

Wednesday, April 1, 2015

FIVE SIMPLE STEPS TO FRAMING AN OIL PAINTING

Hi there and welcome to my simple picture framing tips. If you add a frame to your art without breaking the bank, you will find this simple tutorial easy to follow. After taking a framing class once, I discovered there was roughly a 400% mark up on framing.

As a rule of thumb, I do not frame my paintings due to various individual tastes and preferences that will affect a framing style choice. However, in my opinion and through experience, art is much more appealing when framed.

I am going to share with you some simple steps to get you on your way to framing your work. But first, you must know and understand framing dimensions. It's pretty simple with a pre assembled frame. Please do not to never cover an oil painting with glass or acrylic. It must breathe.

Most picture hanging supplies can be found at your local hardware or arts and crafts store.

For a sawtooth hanger, the tools you will need are: 
(This tutorial is geared towards sawtooth hangers)
1. Screwdriver
2. Hammer
3. Offset Clips
4. Sawtooth hanger
5. Picture Hook
6. Tape measure
7. Ruler (tape measure will work)
8. Pen or Pencil

If you prefer to hang by wire, you will need 

  1. picture wire
  2. D-Rings
  3. Wire Cutters
  4. Hammer 
  5. Screwdriver
  6. Ruler/tape measure
  7. Pen/pencil


IMPORTANT: There is the outside dimension, and an inside dimension. The inside dimension, where the painting actually sits inside a lip or a recessed edge inside the frame, is called a rabbet (see illustration below). The frame size will correspond to the whole inside measure of the rabbet so it will sit inside. This is the part of the frame you need to fit to your canvas. The marked frame dimensions should correspond to the rabbet.


*Please note the dept of the Rabbet. The standard size is 3/4", so if you have a deep canvas, it will not fit flush against the frame when you mount it. 

WHERE TO FIND PRE ASSEMBLED FRAMES

1. Local arts and crafts stores-they usually have a stock of standard 3/4" rabbet frames.

2. Art stores such as: www.Dickblick.com and www.Jerrysartarama.com

Alternatively you may do a Google search. I have found frames at the following sites:

Once you have found your frame and gathered your supplies, you will need to carefully secure your canvas to the frame. 


SAWTOOTH HANGER METHOD

This is where you will need your offset clips. They should correspond as close as possible to the rabbet depth. 

Step 1: Gather your supplies

Step 2: With a screwdriver, you will fasten one end of your offset clip to the back of the frame and the other to the back of your canvas. (see examples below.)  You may do one on either side or choose all four sides. 


If you chose to use a sawtooth hanger, you will center that to the top of the back side of your frame, or canvas if it protrudes the frame, then secure with a hammer. These nails are very tiny and difficult to hold, so I find using a fine tooth comb helps tremendously. 

Step 3: Center your sawtooth hanger horizontally by using your ruler or tape measure.
Step 4: Mark the holes on either side with a pen or pencil.

Step 5:  Drive the tiny nail into the sawtooth hole to fasten it to your canvas. 

Congratulations! You have now successfully framed your painting. 

PICTURE WIRE METHOD

You will need to mark a spot for the D-ring on either side of the frame about 1/3 the way down from the top. Once you have them marked, you will fasten the D-ring into the back of the frame. The wire is secured firmly using a slip knot method, then twisting off and using wire cutters to remove the remaining wire. Make sure your wire is secured taught to avoid loose wire showing above the picture when it is hung. 


Here is a helpful link to a video that you may find useful. 

written by Tina A Stoffel